Friday, December 18, 2015

The Colors of Christmas

There are eight days until Christmas!  (From my part of the world)  

How are your Christmas preparations going?  We hosted a get-together with friends at home (which was SO MUCH fun, hilaaarious actually haha!), and another party on Christmas day, have a few more gifts to buy, to wrap and to bake! (Homebaked goodies make nice gifts.  This banana loaf recipe never fails me.  Friends have been asking for the recipe!)  But you know, Hubby has a more difficult job to do for the Holidays which requires some assembly (hint: it's the kids' Christmas gifts), haha!

I meant to put up this post at the onset of December (because it is all about our Christmas decors) but didn't have the time to sit and start writing it until today.  But as they say, it's better late than never! (A phrase I seem to be using quite a lot these days!)

We really don't have a theme for our Christmas decors at home.  We have old ones and we just added a few more.  We went with the traditional and classic Christmas colors of red, green and gold.


Christmas this year is extra special because we are spending it in a home we can call our own.  =)

Initially, I wanted to have a fresh tree but I was so excited to decorate for Christmas that I started thinking about it before Thanksgiving, haha!  So we decided to buy an artificial tree and get a fresh one next year.

* Play "O Christmas Tree" song here*


Sharing with you the other decors we have at home:

1. Wreaths and Garlands - I love putting a big wreath on the front door because it is sends out a happy Christmas vibe.  It is like a simple way of greeting and wishing everyone a Merry Christmas!


We may not have a fresh tree but. . . we got ourselves a fresh wreath!  Haha!


2. Door hangers - Don't they just put a smile on your face?  They put one on mine. =)


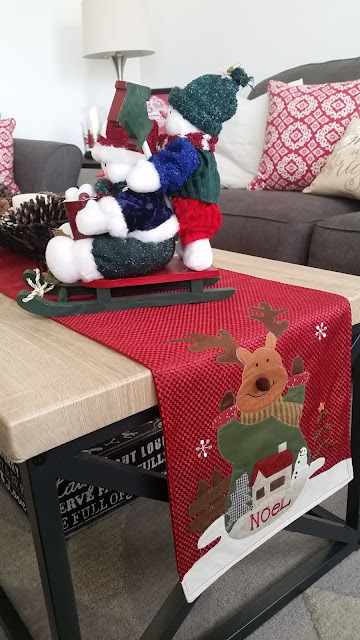
3. Table Runners - They do add that special touch in any table =)


4. Christmas Stockings - One of my fondest Christmas memories growing up was waking up every morning and checking my Christmas Stockings (I still remember that it was made of a felt material and has a Snowman on it) to see what Santa put in it!  


The kids' stockings with their favorite characters on it.

5. Something Shiny, Shimmering, Splendid! - It's Christmas!  I think an element of glitter (or a spray of gold) is needed. . . somewhere, haha!


4. Little Details - some of the things I found useful while looking for Christmas decors were:

 Decorative Gift boxes --- which can also be used as Christmas decors.  And what is nice about doing this is they are not expensive and if you ran out of wrapping paper, you can just easily get one from your decors, haha! 


If you have a decorative tray, you may put any thing that is Christmas-sy in it.  I got a pack of pine cones and a candle as accent for the tray.


Yep, the house is ready for Christmas!  

The house may be full of bright lights and these beautiful Christmas colors but truth be told, there is a certain sadness and emptiness in my heart because this is the first Christmas without Dad (he passed away last April).

I guess deep in my heart the reason why I wasn't too keen on getting a fresh tree was it just reminded me of my Dad.  Growing up in the Philippines, we didn't have fresh cut Christmas trees!  But one day, Dad brought home a fresh one!  We were so excited!  He was able to get hold of one from Clark Air Base (a US military facility) which was located in our province. Waking up and smelling those fresh Christmas trees remain to be one of my favorite memories with him.  

And these are the same memories that would warm my heart as Winter comes.

I love you Daddy. . . and I know that you know . . . I miss you every single day.


Thursday, November 26, 2015

Decorating with Pillows


As I've mentioned in an earlier post, things have been quite busy (and sometimes stressful!) since August because we were moving to our new home (which we did last October).

To celebrate our move, we thought of getting new sofa seats for the living room! (Nah, we really needed new ones)

Initially, I wanted a sofa that is cream or off-white in color (somewhere around that color palette) but then having two toddlers at home, ummm, it's probably not a good idea!  (Kids and anything that is white?  I don't think so, haha!)

So we got this charcoal-gray colored sofa set (which came with throw pillows already) and were lucky to have found a rug to go with it!  Best part of it, everything on this picture (except the accent chair) was on SALE! (Woohoo!  Don't you just love that 4-letter word?!)


After having the sofa set for a week (and STARING at it) I told hubby that I want. . . no,NEED some color!  Our living room just looked so sad (haha!) . . and gray (well, the seats ARE gray, haha!)

What is nice with gray is since it is a neutral color, it isn't hard to match it with any color.  I was thinking of coral, a summery kind of yellow or light blue but since we have a red entryway bench, we decided to stick with this color.


There are so many ways to introduce color in a living room.  You can do it through wall decors, table top accents, floor lamps, etc.  Since I DO NOT have an innate sense of creativity for interior design, I thought of doing the simplest thing I can do!  So for our living room's instant makeover (and to get that pop of color I was looking for), I just bought new throw pillows! 

BUT before I did that, I went online to get some tips on how to mix and match pillows.  I read some very useful tips from this site (Houzz) and went with . . . you guessed it right . . . the simplest one! Haha!  So I went to get a patterned pillow and mixed it with a solid one.  


These pillows didn't come from one store.  I was able to get this look after going to three stores!  Who said mixing pillows was easy?!  Haha!  It is . . . IF you have a natural knack for design!   

Thanks to these pillows, I am definitely happier with how things turned out.


BEFORE


AFTER 


And what is so nice with throw pillows is you can change them easily to go with season like Thanksgiving, Christmas, etc. or just because you feel like changing it, haha!

For the coming Holidays, I just changed one pillow and we are now ready for Christmas!


Our new home is still a work in progress but we are slowly making this house our home. =)  

And it is definitely one of the things we are thankful for this year.

Happy Thanksgiving everyone!

Sunday, November 8, 2015

Must Try Recipe: Baked Honey Garlic Wings

I love chicken wings!  But I only love them when they are fried, haha!  

Oh and my favorite part of the wing is the Drumette!  It is that part which they use for chicken lollipops (another favorite food of mine).

I saw a pack of beautiful Chicken Drumettes (yes, I find beauty even in uncooked food, haha!) when we were doing the groceries so I got one and didn't really know what to do with it.  Actually, I have a favorite wings recipe (Restaurant Style Buffalo Wings) which I blogged before here.  It is my go-to recipe and the only Chicken Wings recipe I've ever tried, haha!  I think it's about time to explore other recipes.

Since we have a bottle of honey (which we rarely use) in the pantry, I want a sauce that has honey in it.  I remembered the sauces that BonChon (a Korean Fried Chicken place) has for their wings.  One has Garlic and another has Honey.  I thought Honey and Garlic together sounds like a good thing for these wings!  But instead of frying them, I want to try baking them . . . for a change.  Plus it's healthier!

There are a lot of recipes online so I just picked two recipes (from these blogs: Spend with Pennies and The Endless Meal) and got something from each of these recipes.  I'm more than happy to tell you that this recipe was a success!  It actually exceeded my expectations.  Haha!  

I looove the sauce!  And I love how the wings, though baked, tasted like they were fried!  Thanks to the 4 tbsp of melted butter that was used to coat them before putting them in the oven, haha!  (Did I mention the word "healthier" earlier?  Well, I think t's still healthier than deep frying them, right? Haha!)

I hope you try this recipe so you can enjoy this messy finger licking goodness!


Ingredients:

Part I
1 lb of chicken wings
Salt or Seasoned Salt
Garlic powder
Onion powder
Pepper

Part II
1/3 cup of All Purpose Flour
1 tsp salt
1 tsp Garlic powder
1/2 tsp Cayenne Pepper
1/2 tsp Paprika
Pepper

4 tbsp of melted butter

Sauce:
1/3 cup of honey
1-2 tbsp of soy sauce
3 big cloves of garlic
1 tbsp of ginger
1/2 tbsp of olive oil or vegetable oil

*Feel free to adjust the measurement of the sauce to suit your taste =)


Directions:

1. For Part I, season the wings with (I just eyeballed the ingredients) salt, garlic powder, onion powder and pepper and let it sit on the ref for at least two hours.

2. Pre-heat oven to 425 degrees F.

3. Pat dry the chicken pieces.  In a big bowl, combine everything in Part II (except the melted butter). Toss the chicken to coat well in the flour mixture.  (I put the chicken and the flour mixture together in a ziploc bag and just shake it).  Remove the excess flour from the chicken.  Then, coat the pieces with melted butter.

4.  Place your wings on a baking tray (line your baking tray with parchment paper or a silicone mat) and bake it for 40 mins (one side) and then turn them around and bake it for 15 minutes or until cooked.


5. Put all the ingredients for the sauce in a pan and boil it (in medium high heat) for 3-4 minutes until the sauce gets reduced to a thick consistency.  Drizzle over the chicken, toss and shake the pieces around . . . 


until each piece gets a taste of that yummy honey garlic sauce!


Dig in! =)


Thursday, October 29, 2015

Baked Salmon ala Conti's

While doing the groceries last weekend, we saw some Salmon and thought of baking it with the Teriyaki marinade which I've tried before.  (To read about it, please click here.)  And just as I was about to start working on the marinade, I suddenly thought of (craved for!) Conti's Baked Salmon! (Conti's is a popular Bakery and Restaurant in the Philippines which is known for their cakes and Baked Salmon to name a few)

So I went online and looked for Conti's-inspired Baked Salmon recipes and found a few but went with the recipe shared by The Happy Tummy Kitchen.  I'm glad I did!  You know the recipe is going to turn out great when your picky eater suddenly says "Mama, it smells good!"  And she said this when we were just working on the sauce.  But it does smell good!  The smell was that of . . . Conti's! *insert dance of joy here* I guess I was on the right track!  


So before I call it a day (and before I forget what I did, haha), I want to share with you this picky eater-approved (hubby-approved too!) Salmon dish.  She ate fish for the first time!!!!  Woohoo!  Thanks to the Cheesy-garlic mayo sauce!  Haha!

Hope you like it too!  

Happy Cooking!

*Inspired by the recipe from The Happy Tummy Kitchen's blog.  For her exact recipe, please click here.  

My take on this recipe:

Ingredients:

Salmon (around 800-900 grams)
Salt 
Pepper
Garlic powder
Juice from half of a lemon

Half a block of Cream Cheese
3/4 cup of Shredded Parmesan (1/2 cup to go to the cheese mixture and 1/4 cup for toppings)
4 tbsp of Mayonnaise
Garlic (3 big cloves, minced)
Salt
Pepper


Directions:

1. Marinade the Salmon (around 30 mins) with salt, pepper, garlic powder and lemon juice.  Sorry, I don't have any measurements, I just eyeball it when I do a marinade. 

2. Pre-heat oven to 450F.

3. Mix the cream cheese, Parmesan, mayonnaise, minced garlic, salt and pepper.  Taste and adjust the seasoning (and consistency) to suit your taste.

4. Butter your baking dish.

5. Pat the salmon dry and put it in your baking dish and top it with the cream cheese mixture and sprinkle some shredded Parmesan cheese.


6. We baked it for 25 minutes and it came out pretty well.  Please take note that the cooking time really depends on the thickness of your fish.

7. Best to Serve it with buttered vegetables and mashed potatoes (I wish I had more time!)


My Notes:

The next time I bake this, I will make more of the white sauce mixture, probably another garlic clove, will bake it a longer time only because we want the top to be a little more golden brown (just a matter of preference).


**********************************************************************************

After posting this entry, I've made this dish soooo many times (it's my go-to recipe whenever we have guests over, haha) so I thought of sharing with you a more updated photo of the dish and that baked golden brown color we love!


Saturday, October 24, 2015

Quickfix to untangle a doll's hair

"Mahangin ba sa labas? "

Directly translated, it means "is it windy outside?"

This was a line from a shampoo commercial which became so popular that Filipinos use it when they see someone having a bad hair day.  
And this is exactly the same thing I say when I see my daughter's dolls!  


Yes, Flulttershy is having a super bad hair day, haha!


It really doesn't bother me because I like my daughter to have fun with her dolls.  But one day, I couldn't take it anymore.  I think the doll was actually asking to be saved, haha!  

So I googled for a solution and found out that fabric softener can do wonders for a doll's untangled hair!  

It is easy as --- 

1. Dip your doll's hair to a cup of softener


2. Brush the doll's hair 

3. Rinse and brush some more


And Voila!!!


 Look who was happy with her makeover?! =)


Well, I think this pink-haired doll has a bigger smile these days, haha! 
You're welcome, Fluttershy!


 Okay, one down. . . . . and a LOT (like A LOT!) more to gooooo . . . .


Thursday, October 22, 2015

Taking the Challenge: Baked Mac and Cheese

I am back!!!

I know, I have been missing in action in my blog for a month!  But I have a good reason!  We just moved to a different house so that pretty much took my (our) time (and it still does!) since the last blog post.  I haven't even gotten the chance to tell some family and friends about our move yet.  (So to my family and friends, if you are reading this, I am so sorry for not writing sooner!  I guess, now you know, teehee)  

I will be sharing with you (in my succeeding blogs posts) some home improvement projects (just minor ones) which Hubby and I did to make this house, our home.

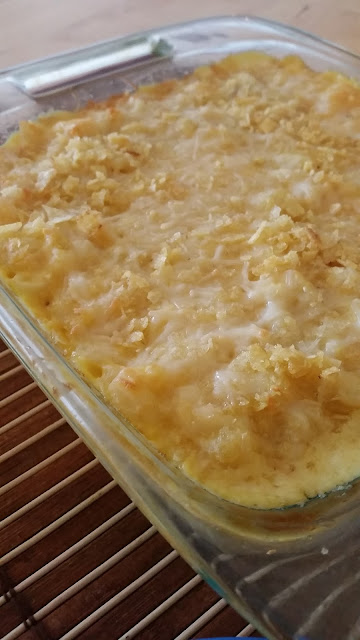
For today's post, I will be sharing with you something I prepared for the kids' lunch today: Baked Mac and Cheese!

(I am blogging about it now before I forget what I did, haha!)


I have tried making Mac and Cheese before but somehow, it didn't work out for me, haha!   Truth be told, it is an easy to do recipe where you just mix together butter, milk, flour and cheese.  The first (and LAST!) time I made Mac and Cheese, it tasted "floury".

But since the kids now are enjoying Mac and Cheese (it is one of the few things they eat when we dine out), I challenged myself to try making it again!  It doesn't have to be good, as long as it is eatable AND it doesn't have that floury taste, haha!

Challenge accepted.

I saw two recipes from two of my favorite Food Network stars, Ree Drummond (The Pioneer Woman) and from the Neelys and took something from each recipe.

(For their original recipes, please click on the links above.)

Ingredients:
Elbow Macaroni - 10 oz package (I didn't use everything though)
1/2 cup Butter
1/4 cup of Flour
2 1/2 cups of Milk
1 tbsp of Prepared Mustard/Yellow Mustard
A pinch of Nutmeg, Thyme and Garlic powder
8 oz Sharp Cheddar Cheese
4 oz Velveeta Cheese
Salt and Pepper

Toppings when you bake it:
Grated Parmesan Cheese
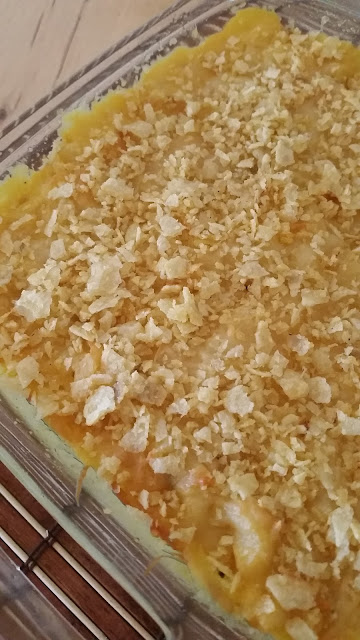
Crushed Potato Chips (I'm glad we had some in the pantry!  I used the Cheesy Garlic Bread Flavored potato chips by Lay's----Yummm!!!)


Directions:

1. Pre-heat the oven to 350F

2. Cook the Macaroni according to package, drain and set it aside.

3. Melt the butter and then sprinkle the flour, whisk it together for a couple of minutes on medium -low heat.

4. Add the milk slowly and continue whisking everything together.  As the sauce thickens, add the mustard, nutmeg, thyme, garlic powder, salt and pepper.  Mix everything well.

5. Add the cheese, stir and let it melt.
Taste to see if it is to your liking.  Feel free to add more of your seasonings and more cheese!!!!  

6. Add the macaroni pasta.  I suggest you do it gradually (don't dump the macaroni all at once) to come up with the consistency you like (ratio of the cheese sauce to the pasta).  You may serve it as it is or you may bake it.  

If you want to bake it, I suggest make it more saucy to avoid drying up your  Mac and Cheese. 

7. Butter your baking dish, pour the Mac and Cheese and top it with grated Parmesan Cheese and crushed potato chips!  


Notes:
I definitely found the Mac and Cheese recipe that worked for me!  Happy to say that it is toddler- approved!  The next time I'm doing it, I will add more salt (I just added more crushed potato chips on top of it) and add another type of cheese!  I am sure that adding other types of Cheese like Gruyere, Fontina or Asiago would do wonders!

Happy Cooking!


Thursday, September 17, 2015

Keep those coins!

I am sure that at one point in our lives, we had piggy banks!  I don't remember being able to fill up mine though.  I think I wasn't patient enough haha!
    
If piggy banks were a test of a person's patience, well, my husband is a winner!  (Actually, I don't need a piggy bank to tell me that, he is one of the most patient people I know)

This is his "piggy bank" (well, it is a baby bottle that is a piggy bank. . . I know you know what I mean, haha)


He has been religiously filling this up with all the loose change he gets for two years now.  Care to guess how much is in it?  (Make a wild guess before you reach the end of this post, it will be fun!)

One day, this bottle just had enough that we can't drop coins anymore.  So it's time to take everything out.  Actually I don't mind counting all the coins!  But thanks to Coinstar, it just makes counting coins so much easier and faster!

I call it the green ATM, haha!  


Coinstar was actually a brainchild of Jens Molbak and was used for his Graduate School project in Stanford University.  Please click on this link to know more about Coinstar's History.

How does it work?

Before you put your coins in the machine, you get to choose whether you want cash, an e-gift card or a charity donation.

If you choose cash, there is a 10% fee which they deduct from the total amount of coins.

If you prefer Gift card, there is no fee, thus, you will get the total amount at selected establishments like Amazon, Best Buy, Home Depot, Starbucks, Nike, Chili's, Sears, to name a few.

How easy can counting coins get with this machine?

Just drop the coins in a tray which would then lead to a slot.

Before you proceed, have you picked a number for the total amount of the coins in the bottle?!  If not, make one now and let's see how close you are! =)


At the end, the machine would show you the total amount of the coins and the breakdown:


It would probably have been $400 if the Princess didn't get some of the coins, haha!


So did you make a good guess?!

Honestly, I would have preferred a gift card from Home Depot than Nike but unfortunately the machine we went to only had Nike, Starbucks and Chili's!  I don't want to spend all that money just for coffee or food???  We thought it is the same for all kiosks but probably the one we went to had system problems.  We should have gone to other kiosks!  Oh well. . . we can start again!    

Remember, every penny counts!  Start saving those loose change, you will be surprised how much you'll save.

For more details about Coinstar, please visit their website.

Saturday, September 12, 2015

The LA County Fair 2015


I grew up in the province in Philippines and one of my fondest childhood memories was going to the perya (local carnival) with the whole family during our town fiesta.  There were several game booths and rides we enjoyed.  My favorite ride was what they call the "Caterpillar" and my favorite game booth was the Balloon Popping game (where you had to use darts to pop  the balloons)!  I hated the Horror Train because I was really scared of it!  Yes, even if I knew everything was not real and were just badly made scary props haha! There were also "special shows" like those that featured a pair of Siamese Twins.  Simple joys from visiting the carnival included eating cotton candy and those old-fashioned pink-colored popcorn.  Carnivals have a special place in my heart because they bring me such happy and good memories!  This is the reason why I wanted to go to the LA County Fair which opened last September 4 (and would run until September 27, 2015).

The first County Fair I've been to in LA was Orange County's (which we visited last year).  After experiencing the LA County Fair, I have to say that I like it bettter because it is bigger and there were more rides for the kids to enjoy.


If the kids were excited about the rides, I was excited about food tripping! Haha! 

So we started our Carnival day with a Gyro Sandwich and a burger.   . . . 

Then my little girl looked up to me and said. . . "I like rice!" Haha!  So sh ended up eating just the pita bread (which she liked) from the Gyro sandwich. 

The kids enjoyed different rides . . . 

And Hubby enjoyed playing hoops!  He was in good shape (or was he just lucky??? Haha!) that day (Nahhh, he was really good) that he won two basketballs for the kids! (Woohoo!  Huney, I just have to say that you're so sexy when you play, hahaha!!!)


Some of the game booths we saw. . . .


I wanted to try this one BUT they didn't use darts!  They use bean bags to pop the balloons which I think makes it harder to do.  I don't have a good arm!  Haha!


Saw this giant slide!!!!!  It's one thing. . . . I will . . . NOT do! 


Besides Rides and Games, they also have a number of expo halls where you can find a myriad of things!  

From artificial grass (if you want that lush green garden without having to water it, haha), to a Tempur Bed . . .


And this is probably the most interesting thing I spotted  . . . .  

The company actually made one like this for a client . . . goes without saying that the client was a die-hard Dodgers fan!

In between the rides and walking through the expo halls, we tried the following Carnival eats!


From left to right (Clockwise) - Dippin dots ice cream, Grilled Corn on the Cob, Fried Chix in a Stick and a Hollywood fave since 1939. . . Pink's Hotdog!

Also spotted. . .ginormous turkey legs!  (Haven't tried this yet.)  Seeing these remind me of the Medieval Times, haha!  I think they would totally fit in the set of Game of Thrones!  Di baaa?!! 


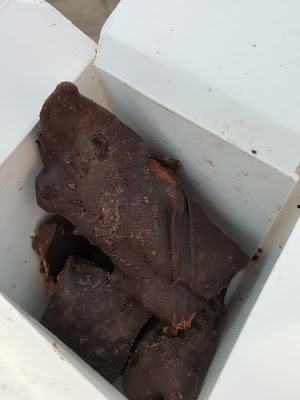
And for something different, we tried the chocolate-covered bacon. . . which I didn't like, haha!   I still prefer my bacon as it is.


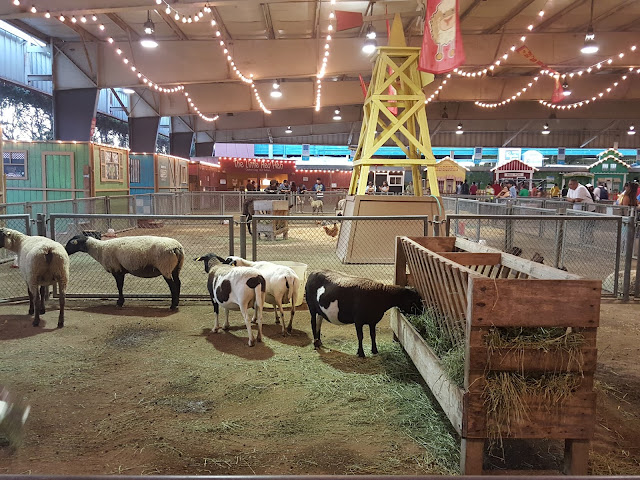
On our way out, we dropped by the Petting Zoo. . .  


I wish though that they had something like this which our little boy enjoyed at the OC fair last year. (If they have it, please let me know so I can update this post accordingly.)  


We had an amazing (and tiring!) day at the LA County Fair!  I was telling Hubby that probably we burned at least half of the total calories of everything we ate, haha!

I may have seen a number of carnivals that are fancier than the perya I know.  But my perya still has the No. 1 spot in my heart because it brings me back home, to my family and to my happy childhood. (Okay, I'm getting homesick again)

For more details about the LA County Fair, please visit their website.


Related Posts Plugin for WordPress, Blogger...