Thursday, February 12, 2015

The Packing House at Anaheim

When I visited California for the first time (2008), one of the cities I went to was Anaheim (located in Orange County) because this is where you will find the happiest place in the world!  And that is the only thing I know about Anaheim. . . .Disneyland!  Haha! 

Last month, I got the chance to explore another place in this city called the Anaheim Packing District.  In this District, you will find the Packing House (which is what this post is all about), Farmers Park and the Packard Building.

By the way, here is a brief history about the Packing House which I read from different articles.

In the old days, there are several packing houses built across the US.  What is a packing house? A packing house is a place where farmers bring their produce like fruits so they can be packed and distributed across the country (through the use of railroad cars).  One of the most notables ones was the Sunkist plant in Anaheim which was built in 1919.

The Packing House then. . . .
Photo from O.C. History Roundup blog

And NOW. . .
Photo from the LA Times
Thanks to a group of developer (LAB Holding) and a multi-million dollar renovation, this old 2-story packing house has been given a new lease of life and has been transformed to a foodie's haven.

This was the other side of the building where we enteredr . . .


From the entrance, you would know that the details for this place have been well-thought of.  Just before you enter, you will see some rocking chairs where you can sit down, relax and well. . . rock.  Haha!  

The Princess enjoyed rocking these chairs =)

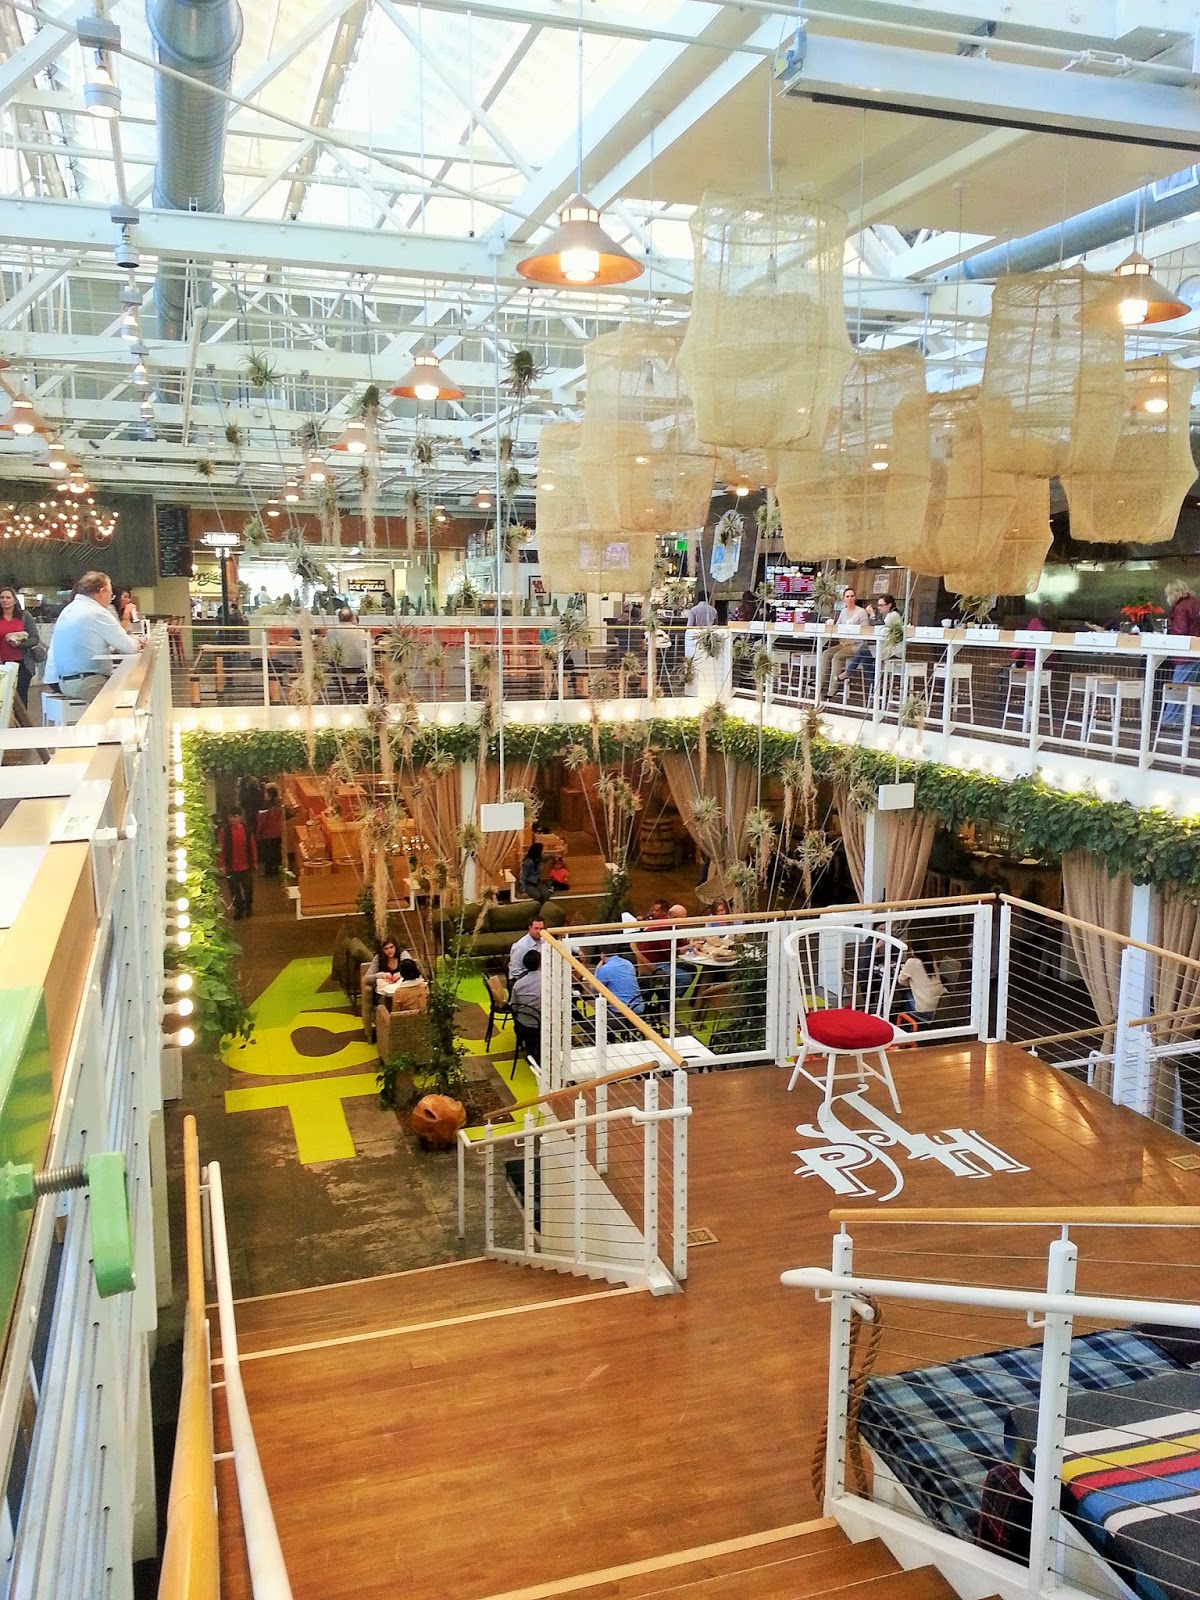
The building's facade may look plain and simple but behind these doors is a cool and hip place which has that vintage-retro vibe too.  I'm not really knowledgeable in architecture and interior design so I don't really know how to describe the place, haha!  I'll just let the photos do the talking.


I want one!

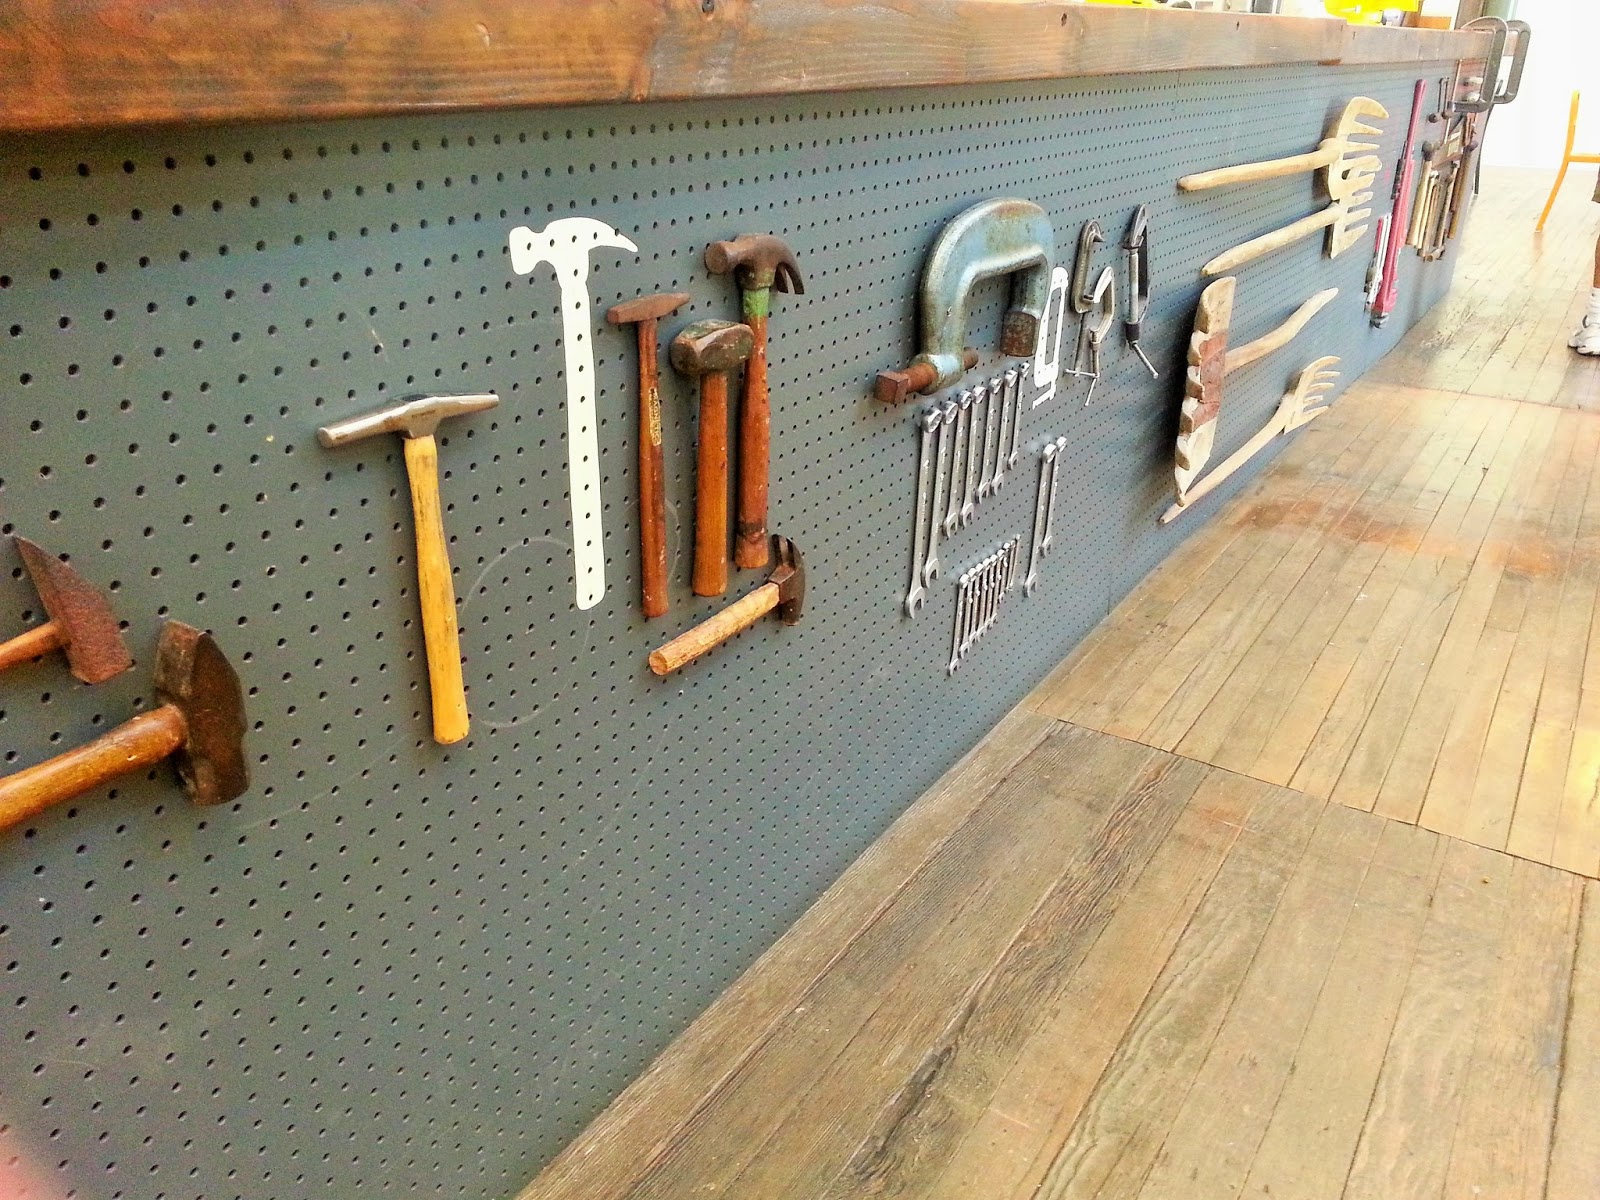
This bar (aptly named Hammer Workshop and Bar) used different tools to decorate their place.


It even has a tractor which the Princess enjoyed "driving"!


The place has a nostalgic feel to it too as seen in some details like this film viewing room which shows silent movies. . .


Stepping inside it felt a little bit. . . creepy, haha!


It's all about details. . . 


Look at this table. . . it must have been a part of a railroad car or a track?  I am sure it was part of something from the old days.


This table was made from repurposed old crates  . . . 
. 

Old luggages as tables too . . . 


A vintage weighing scale. . .a thing of beauty but NOT a favorite thing of mine. . .and I mean ALL weighing scales are not in my favorite list!  Haha!


Even the restroom had a retro-vintage feel to it =)


There are areas outside the house where you can also hang out and just chill. . . 


Can I have a backyard like this pleeease?


Such a cool way to display the names of the food establishments in the Packing House. . . 


There is a good number of food choices in this place.  What I really wanted to try was the burger from Wheat and Sons (read that they have good burgers).  Guess what, they were closed that particular day for their menu planning! Haha!

So we tried Kroft and ordered their Country Fried Chicken Poutine (Poutine is a dish that originated from Quebec, Canada that is made of french fries and topped with light brown gravy-like sauce and cheese curds - from Wikipedia)
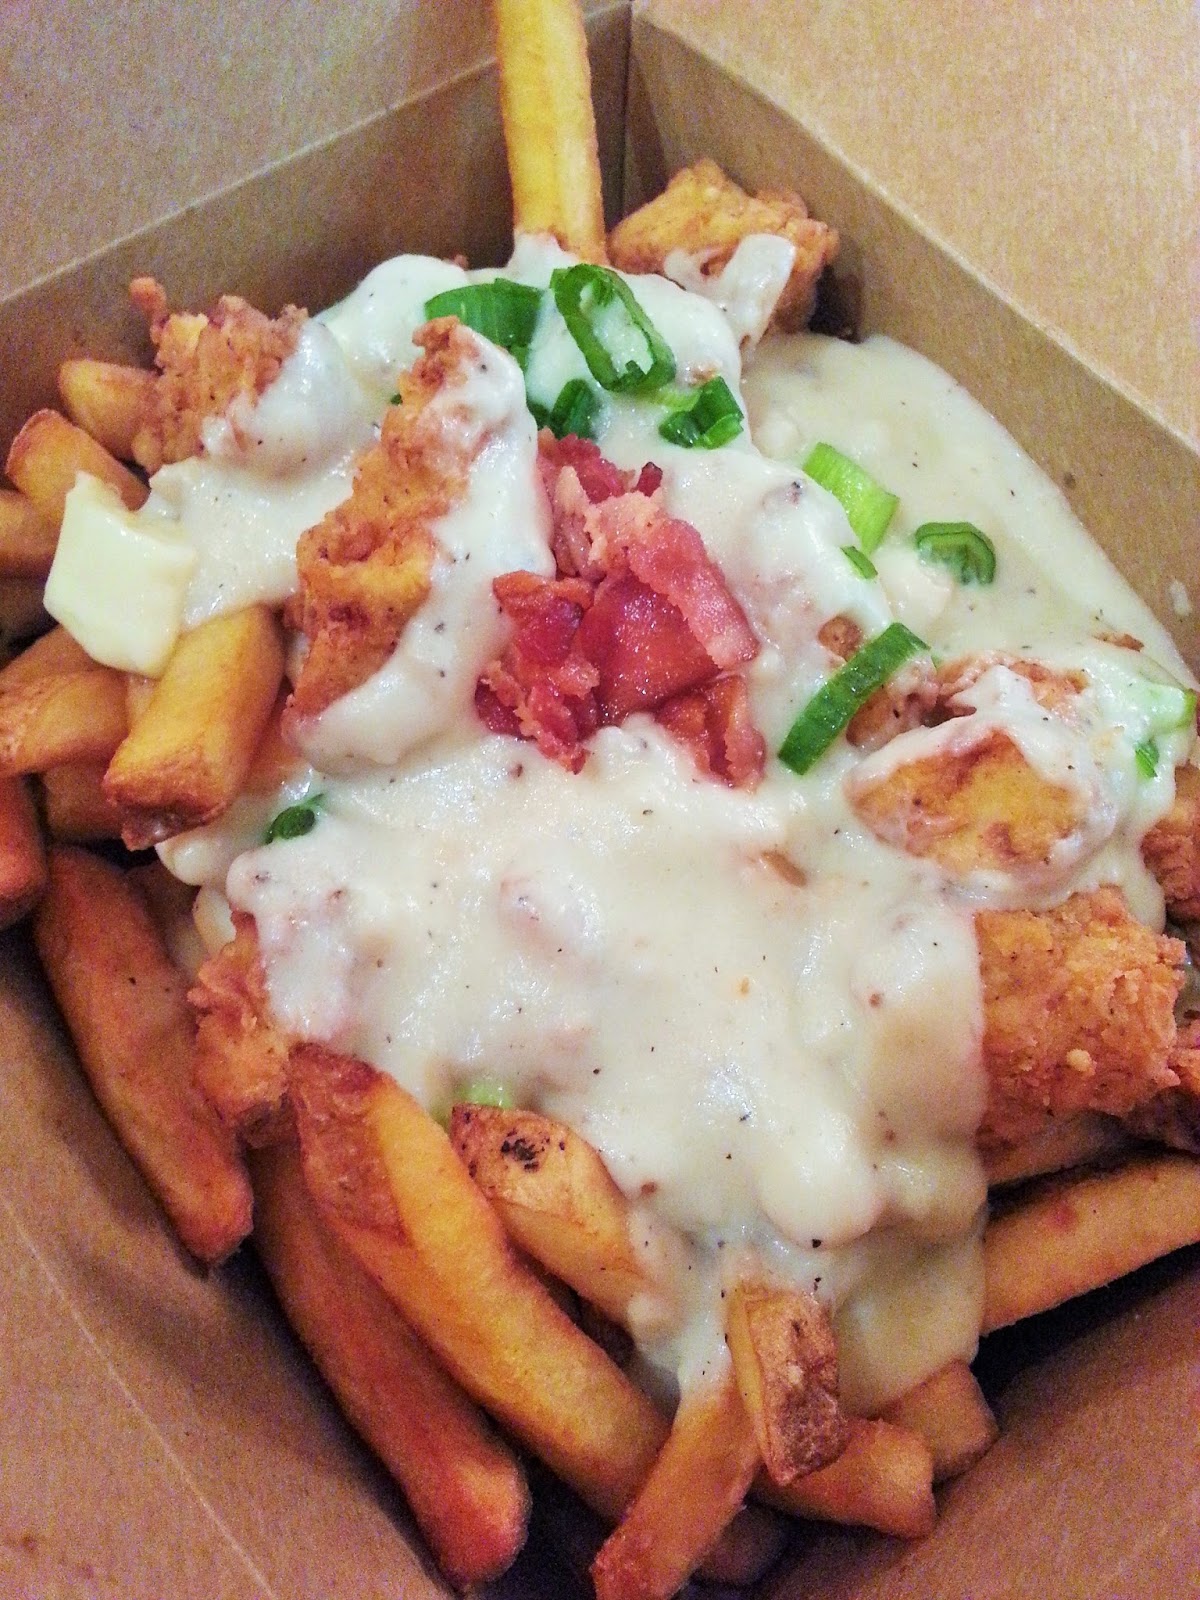
Loved the Fried Chicken!

And the Prime Rib Dip

I should have ordered their Chicken sandwich, haha!

And then we got Ramen from Orange Tei for the Princess. . . which was actually tasty.


Then we tried some Indian food from Adya and ordered Chicken Tikka.  It was okay.  It has a subtle flavor.  I prefer a more intense flavor in when I eat Indian food.


And the thing that I tried that which I loved most. . . was the organic coffee (Cappuccino) from Cafecito!


These are just a few of the food vendors you can find in the Packing House.   There is one which serves good grilled cheese, another serves Southern comfort food, a crepe place and one that serves Vietnamese food (to name a few).  You can say that we will be going back to try the others including this one (which they say always gets a long line). . . .

Gelato in a stick!

For more details about the Packing House and the Anaheim Packing District, please click this link.


Saturday, February 7, 2015

Happy 6th!

I can't believe it's February already!  Where did January go?! 

Since February is known to be a Love month, my first post for this month is all about Love! 

February is one of my favorite months because is also our Anniversary month . . . both as boyfriend-girlfriend (we don't really celebrate it though) and as husband and wife.  This year is our sixth year together as a married couple (but we've been in each other's throats . . .ehrmm, I mean lives--- haha! for 14 years).  

By the way, did you know that for the Anniversary gifts, there is a list for traditional AND modern! For the 6th year, traditional items are candy/iron and for modern, it's wood.

I've been making anniversary posts every year since I started blogging.  (You can read the first one here). 

For this year's Anniverary post, I thought of sharing with you some wedding photos from that special day and the stories that come with it.

A part of our wedding invitation . . .


The design for our rings was chosen by Hubby but I had to send back mine because . . . I thought it needed a little more oomph, haha! 


The person who made Hubby's barong was a tailor from Batangas (I came to know about him from an online community for brides) and goes to Manila weekly to meet his clients.  Since he doesn't have a place of business in the city, we met him at a food court in one of the malls!  The sight of him taking hubby's measurements in the food court still makes me laugh to this day.  He is such a nice and simple man and I hate that I forgot his name! (Blame it on my Mommy brain, teehee)  But let me tell you, the Barong was superbly done, wouldn't have it any other way!  


For my bouquet, I knew exactly what I wanted.  I wanted it to be all white and I wanted Stargazer Lilies.  


Weeks leading up to the big day, I have repeatedly told myself that I won't cry when I walk down the aisle.  Well, I did a good job!  There were no tears!  Do not underestimate the power of the mind, haha!  A friend described me as the giddiest bride she ever saw.


And the groom was his usual self. . . just cool . . . happy and cool. . .


And I think my parents were just happy to give me away, haha! (If your daughter is 34 years old, wouldn't you be jumping over the moon?!  Haha!)


But you know, deep in my Daddy's heart, I'll always be his little girl. . . 

This is how he really feels, haha!

One of the things I told Hubby before the wedding was when the "you may kiss the bride" part comes, after he lifts my veil, he should fix it and and make sure that it won't cover my face, haha!  

This was me reminding him about that, haha!


If there's one thing I wish I did, I wish we practiced our wedding kiss!  


There is a funny story about this family picture below.


This photo was taken before the Reception.  When the photographer said, "let's take a family picture", we were all calling each other to take their places and all.  And then we realized, Hubby was there on the side, quietly waiting to be called, hahaha!  We sort of forgot that he is also in the room, haha!     

During the Reception, Hubby and I struggled to cut the cake.  We really did!  We spent a good few minutes slicing through the cake.  I completely forgot about the one inch styropor base in the cake (which the baker reminded me about). 


I thought that there won't be any crying/drama at all but I was wrong. . . hahaha!


There were a few tears here and there. . .

I can't really remember what I said at the end of the Programme (I have to watch our wedding video again, haha!) but there is one thing I clearly remember until this day.  

I remember telling my Husband that . . . 


"I'm glad it was you. . ." 

Happy Anniversary Huney!  Thank you for the love (that grows) and for keeping your promise. Thank you for still making me feel beautiful (even with the extra pounds, haha!)  Thank you for taking good care of me (and the kids) and thank you for spoiling me (and the kids) in your own way.  
You are a good husband and a good father who just makes us happy.  I couldn't ask for anything more!  Each year just gets better.  

I love you Hun. . . 


Photos by: Mimi and Karl


Sunday, January 11, 2015

Of Waffles and Red Velvet Cupcakes

I can't believe I wasn't able to post anything last December!  I thought it's a month where I can blog a lot of things, but well, it didn't happen. . . again! 

So for 2015, I am starting my blog post with some love by sharing (because "Sharing is Caring") with you a couple of  my kitchen-tested recipes.  They are not my recipes.  I don't (and I can't, haha!) come up with original ones, I just follow them and do a little bit of tweaking if needed, haha!

Last Christmas, a family member gifted me a waffle maker!  I've been wanting to buy one but never got around to get one so I am soooo happy when I opened my gift!  Woohoo!

So I googled for a waffle recipe (yes, I prefer making pancakes and waffles from scratch!) and found "THE ONE"!  Truth be told, this is the first waffle recipe I've tried but it is a keeper so I'm going to stop looking and trying.  (Just like the "BEST EVER" Banana Bread recipe I posted earlier.  By the way, I gifted some family and friends with the Banan Bread and I'm happy to say, they ALL loved it!  Yayyy!)

The waffle recipe I tried was by Ree Drummond (the Pioneer Woman) because I am a fan!  I like her food because they are easy to make and I see myself eating them  . . . meaning I don't find them too fancy, haha!  Her food is all about home cooking love and family.

This recipe is easy to make but requires some eggs (4 eggs where you will only use 2 yolks so that means you have 2 unused yolks after doing this recipe) and a little bit of extra effort (you got to beat the egg whites until they get stiff).  But don't worry, everything is manageable!

At the end you will be rewarded with a good and tasty waffle!!!!  Oh and some scrambled or an omelette on the side. . . from the unused yolks, haha!


My Princess loved this waffle so much that a) she prefers waffles over pancakes now and b) she has been eating waffles for three days straight, haha!

For the complete recipe, please click on this link which will lead you directly to the Pioneer Woman's blog because she does a good job of explaining the recipe (complete with photos!).


For the second recipe, I finally found one for Red Velvet cupcakes which was easy to do and which gave me cupcakes that were moist and spongy!  *Insert Dance of Joy here*  

If there's one thing I learned from reading and trying baking recipes, the use of yogurt (I use Greek vanilla yogurt) in your batter does make a difference!  They do make the cake moist!

I'm not really fond of frosting in cupcakes but I can't imagine Red Velvet cupcakes without the cream cheese frosting, haha!  Making this frosting is a first for me and I'm glad it turned out pretty well too.


For the complete recipe of this Red Velvet Cupcake (By Averie Cooks), please click on this link.

For the cream cheese frosting, I followed this recipe from Sally's Baking Addiction.  Sally's blog is blog is down at this moment so I would just listing down what I did

1/4 cup of butter - softened to room temp
4 oz of Cream Cheese - softened to room temp
1 cup of Confectioner's sugar
1/2 tsp of vanilla extract
1 tbsp of milk

Cream the butter and cream cheese together and mix it well.  Then add a cup of Confectioner's sugar and whisk or beat it with an electric mixer and add the vanilla extract and 1 tbsp of milk and beat it on high for at least 2 mins.

If you don't have a piping bag for the frosting (like me! haha), just put your frosting inside a ziploc bag and cut one of it' bottom corner and start frosting! =)

Hope you would like these recipes too!

Happy Baking!!! 


Saturday, November 22, 2014

Kitchen Tested: Best Banana Loaf Bread Recipe . . . Ever!

Okay, I just had to put "Ever!" because it is really the best banana loaf recipe I've tried!  Actually, this is just the second (haha!) time I baked a banana loaf.  But I am going to stop trying other recipes because I found the perfect one for me!   


The first recipe I've tried was moist and it had peanut butter and Nutella in it but these flavors overpowered the taste of the bananas. Sometimes, it is better to keep things simple (as much as I like peanut butter and Nutella, haha!).  So I found a simple, easy to do, easy to follow banana loaf recipe at Food.com.

I know I said "keeping things simple" and I did. . . sort of, haha!  In addition to the ingredients listed in the recipe, I just had to add semi-sweet chocolate chips and chopped pecans, cinnamon powder (because cinnamon and bananas go well together!) and around 2-3 tablespoons of greek vanilla yogurt (because I read that adding yogurt in your batter makes your cake/cupcake extra moist)!  

This banana loaf got me giddy with excitement!  It was love at first bite. . . .literally, haha!  It was moist, I can smell and taste the bananas and it has the perfect balance of sweetness. 


If you are looking for a better banana loaf recipe like me, this is it!  If you are going to bake for the first time, make this your first!  And if you are thinking of Christmas gifts, this can be it! 

I hope you will like love this banana loaf recipe as much as I did!

Happy Baking!


Below is the original recipe from Food.com.  I have put my personal notes/comments in red:

Ingredients:

  • 1/2 cup butter (softened at room temperature or you can microwave your butter for 15 seconds)
  • 1 cup sugar
  • 2 eggs, beaten (I did not beat them together. I beat them one at a time as I mixed them in the batter)
  • 4 bananas, finely crushed (I only used 3 overripe bananas - equivalent to 3 cups of mashed bananas)
  • 1 1/2 cups flour
  • 1 teaspoon baking soda
  • 1/2 teaspoon salt
  • 1/2 teaspoon vanilla
  • My own addition to the list:
  • 1 tsp of cinnamon
  • 2-3 tbsp of greek vanilla yogurt
  • 1/2 cup semi-sweet choco chips
  • 1/2 cup pecans, chopped
  • Directions:
1. Cream together butter and sugar.
2. Add eggs and crushed bananas. (Add the yogurt and cinnamon powder too.)
3. Combine well.
4. Sift together flour, soda and salt. Add to creamed mixture.  Add vanilla.  Add the chocolate chips, pecans then mix everything but do not overmix)
5. Pour into greased and floured loaf pan.  (Since I was using a non stick loaf pan, I didn't grease and flour it anymore).
6. Bake at 350 degrees for 60 minutes.  (Mine took a little bit longer). 


Sunday, November 16, 2014

A Baking Disaster!

Aaaaaaacccckkkk!!!!  I just had a baking disaster!

What happened?

One of my favorite cupcake recipes is the Pinoy Cheese Cupcake by Kawaling Pinoy. (I blogged about it here.)  I have made this recipe several times and the cupcakes always come out great!  So yesterday morning, while mixing the batter, I felt that something just wasn't right, the batter felt heavier.  But I really didn't give it a thought.  So when I tasted them, something definitely went wrong. They were dry and tasted . . . floury.  So I went back and realized that I used the wrong measuring cup when I was doing my prep work!  The recipe calls for 1 3/4 cup.  I thought I was using a 1/4 cup but I was actually using a 1/2 cup!  (Aren't fractions fun?!!!)  So what was supposed to be a 3/4 cup of flour became 1 1/2 cup!  That was a lot of extra flour!

See how dry they are?  


Looking at them makes me sad, haha!


I don't want to throw them because they aren't that bad but I cannot eat them as they are.  So my plan was to just heat them in the microwave and put a scoop of Dulce de Leche or Butter Pecan ice cream over them.  (Yummmm!!!)

But I woke up this morning and thought why not try using them for French Toast?!  I made a mixture good for 2 cupcakes.  

Here you go:

Ingredients:
1 egg
1/4 cup of milk
1 tsp of cinnamon sugar
1 tsp of granulated sugar
1/2 tsp of vanilla extract

Just beat the egg and then whisk it together with the rest of the ingredients. 


Dip the cupcake slices in the egg mixture (for a few minutes).

Melt some butter (over medium heat) in a non-stick pan and then fry the slices until golden brown.


Serve with pancake syrup, Nutella or your favorite spread. =)


These were so good, my picky eater asked for "more". . . three times.

What can I say?  It was a good day to have some dry cupcakes! =)

So if you find yourself having some baking disaster, do not fear.  You can French toast anything! Haha!
Related Posts Plugin for WordPress, Blogger...